# 1 表单设计态
# 工程:
cap-front/form-design
# 表单设计:
form-design\src,启动命令是npm run dev ,打包命令npm run buildSeeyon
# 操作设置:
form-design\others\src\authDesign,启动命令是npm run devo ,打包命令npm run buildo
# 业务列表设置:
cap-core
# 运行调试:
(1)安装依赖(在form-design层级运行npm i)
(2)代理服务器
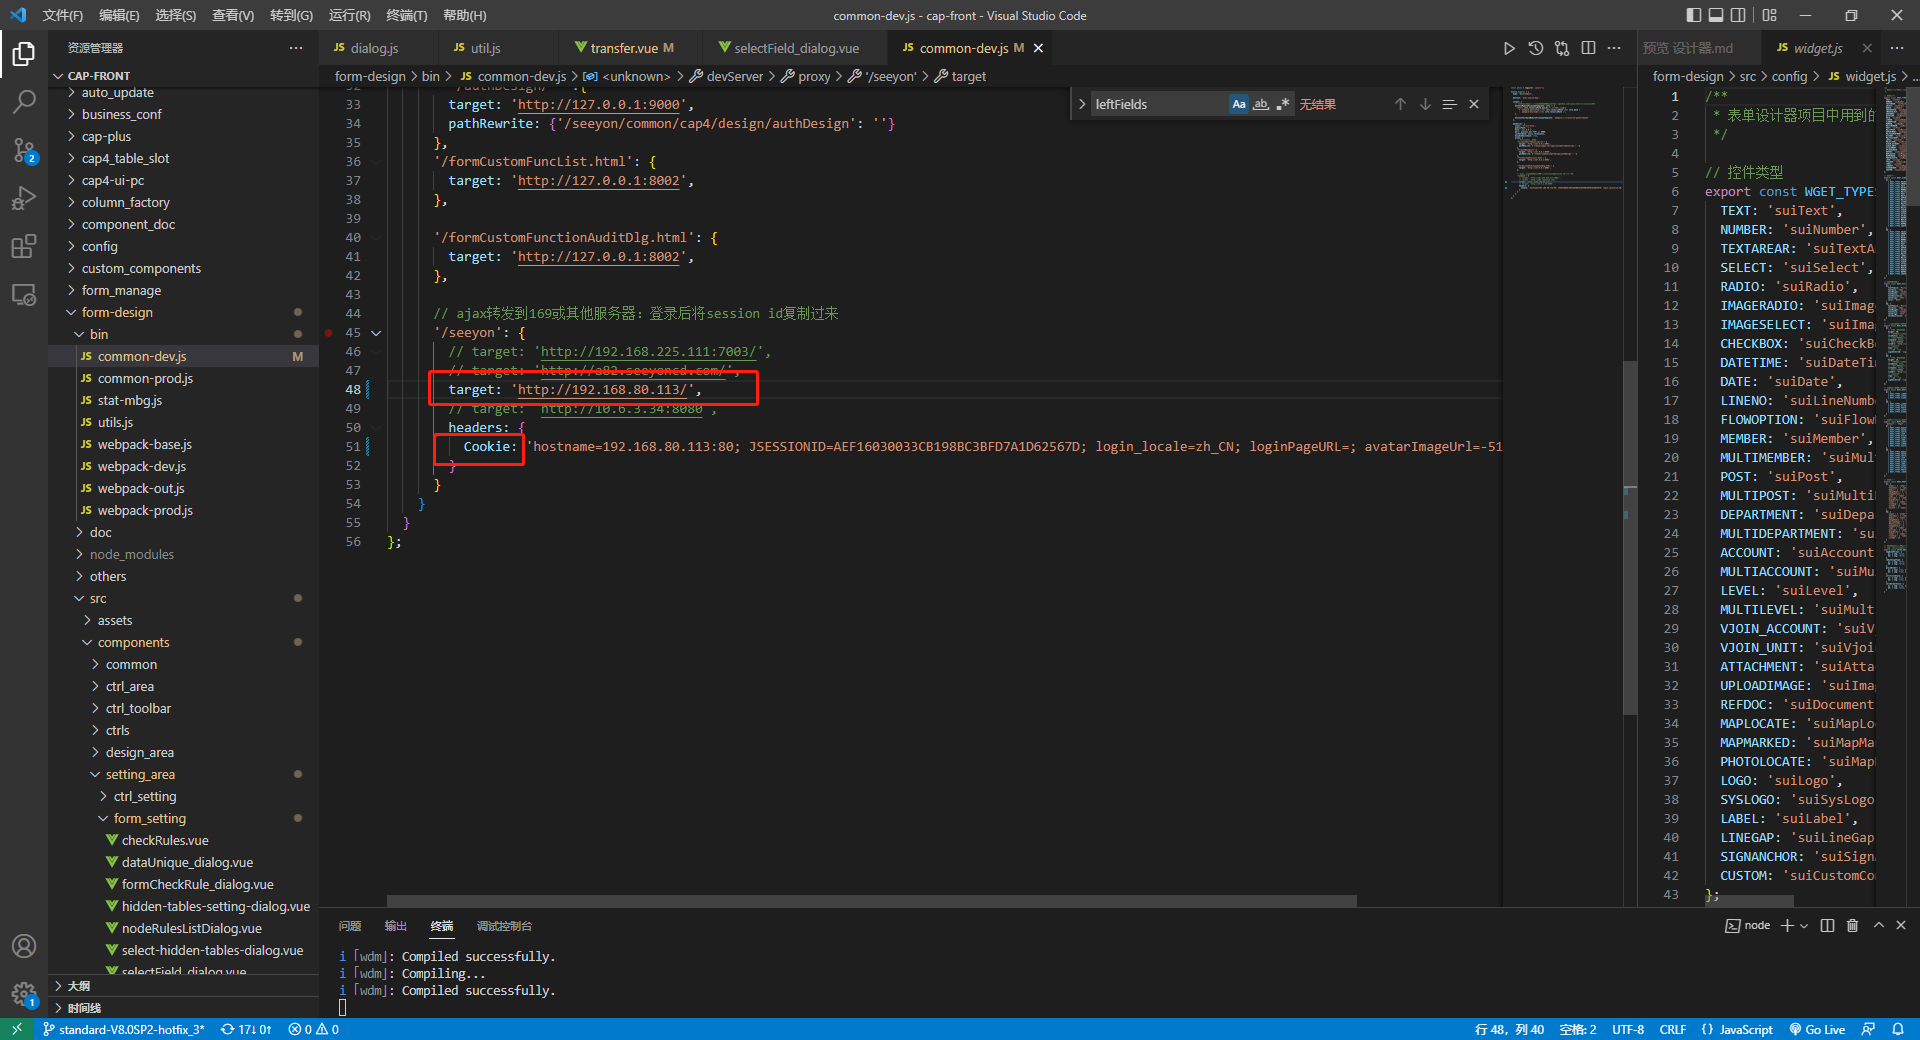
cap-front\form-design\bin\common-dev.js
target:代理目标地址
Cookie:将登录后的代理地址的Cookie复制替换
然后运行

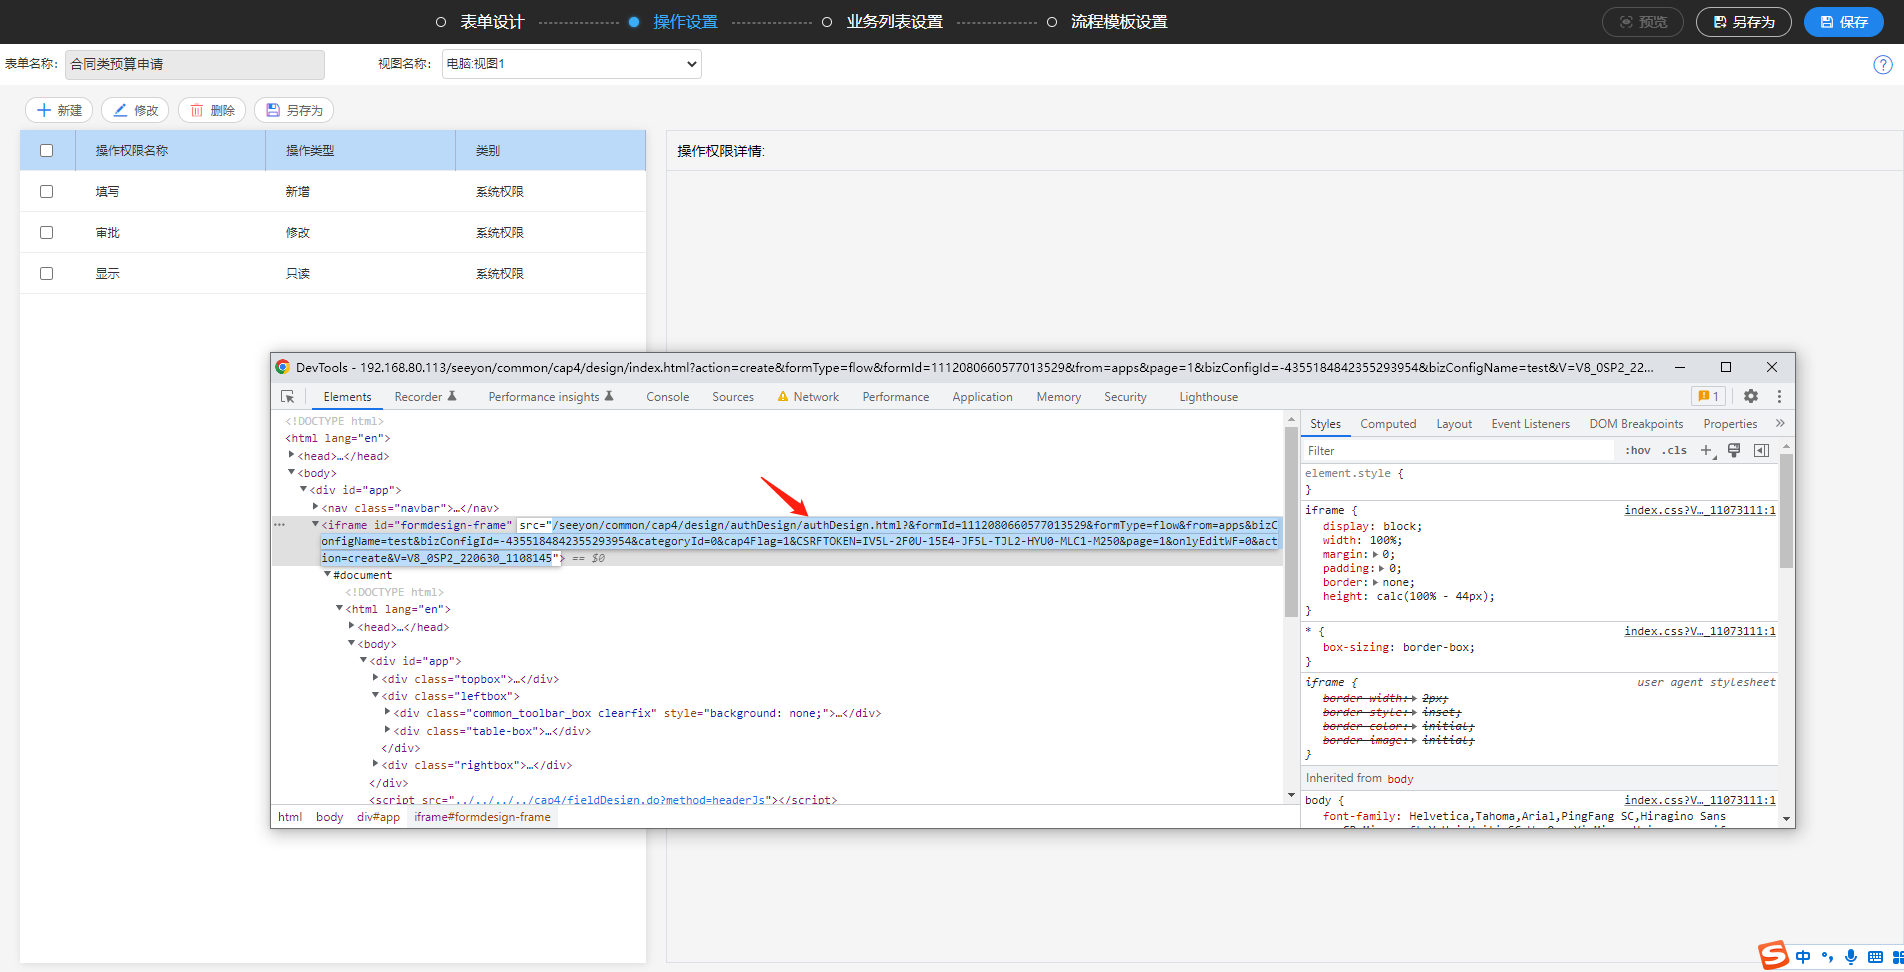
运行后,将代理地址的设计器页面url index.html后的复制下来,放到运行本地工程的地址后就可以调试了
# 表单设计 (ip)/index.html?


# 操作设置 (ip)/authDesign.html?

# 2、表单运行态:
# 工程:
cap-front
# 项目文件:
cap-front/pc_form
# 调试方法
1、在cap-front/pc_form项目工程中使用 npm run dev 启动项目
2、在运行态把iframe中的地址copy一下,新开一个浏览器页签,使用localhost/[copy_url]
# 暴露给业务的方法
CAP4表单控件暴露给客开的js在 cap-front\pc_form\static\js\redirectApi.js
CAP4表单的状态可以通过setFieldData方法更改
# 明细表、明细表高级设置
明细表、明细表高级设置(表头有筛选项)是两套不同的代码实现逻辑
明细表入口文件: pc_form\src\components\drawTable\index.vue
明细表高级设置表入口文件:pc_form\src\components\drawListTable\index.vue
提示:运行态明细表、明细表高级设置【新增】【删除】【复制】是通过后端接口返回的数据做渲染
# CAP4控件-能否编辑
1、先看后端接口 form/createOrEdit 接口返回数据中对应的auth 是否有问题? 2、后端的【auth】有问题,让后端处理,如果没有问题继续看第3点 3、查看标准代码控件对应的组件是否渲染有问题?cap4控件path:cap-front\pc_form\src\components\widgets 4、标准代码控件没有问题,定位暴露给客开的setFieldData方法是否被调用?一般情况下,标准组件没有修改控件的编辑的权限,99%的可能是客开通过setFieldData修改。
# CAP4控件-大写控件未更新修改方法
在8.1sp1之前的版本:
修改文件是 cap-front\pc_form\src\mixins\handlerData.js 文件中的backfillFormControlData 方法
  // 自定义控件数据回填
    backfillFormControlData(params, formmainName) {
        const { fillBackControlData } = this;
        const _self= this;
        let changeFields = {};
        // 阻止计算
        this.limitCalculate = true;
        // 处理回填的是Array还是Object
        if (Array.isArray(params)) {
            params.forEach((item, index) => {
                fillBackControlData(item, changeFields, formmainName);
            });
        } else if (Bridge.checkDataType(params, 'Object')) {
            fillBackControlData(params, changeFields, formmainName);
        }
        // 将这句话注释掉,就可以解决
        //if(Object.keys(changeFields).length > 0){
            // 全表计算
            setTimeout(() => {
                // 释放计算锁
                _self.limitCalculate = false;
                _self.allTableCalculate({},
                Object.keys(changeFields), formmainName);
            }, 10);
        //}
    },
# CAP4控件-自定义控件渲染异常修改方法
cap4中选人自定义控件的文件在: pc_form\src\mixins\loadControl.js
renderFormComponents 方法
问题:在form表单中使用中发现配置条件后表单控件出现渲染错误等问题,可以使用以下方法解决:
fieldCustomV2组件渲染时绑定key,同时给fieldCustomV1组件渲染时绑定key
 <fieldCustomV2
 key={data.Xkey}
 data={data}
 formmainName={formmainName}
 formdata=
 {drawInitData.currentFormData}
 formDetails={getCurrentTableDateils}
 formSave={formSave}
 currentRight={currentRightId}
></fieldCustomV2>

 <fieldCustomV1
 key={data.Xkey}
 data={data}
 formmainName={formmainName}
 formdata={drawInitData.currentFormData}
 formDetails={getCurrentTableDateils}
 formSave={formSave}
 currentRight={currentRightId}
 onBackfillFormControlData={
 this.BackfillFormControlData
 }
 onBackfillFormAttachment={
 this.backfillFormAttachment
 }
 onBackfillFormUpdateData={
 this.backfillFormUpdateData
 }
 ></fieldCustomV1>
# cap4表单附件不能预览修改方法
cap4表单预览使用_previewType方法
cap-front\pc_form\src\mixins\utils\form-controlWork.js
// 查看控件业务关系
    _previewType(...args) {
        let [iType, type, params, index, attType] = args;
        if (attType === "img") {
            const datas = [];
            params.attachmentInfo.attachmentInfos.forEach((v, i) => {
                const t = v.filename.split(".");
                if (iType.indexOf(t[t.length - 1].toLowerCase()) >= 0) {
                    datas.push({
                        src: `${Config._ctxPath()}/fileUpload.do?method=showRTE&fileId=${v.fileUrl}&createDate=${v.createdate}&type=image&showType=big`,
                        originalsrc: `${Config._ctxPath()}/fileUpload.do?method=showRTE&fileId=${v.fileUrl}&createDate=${v.createdate}&type=image`
                    });
                    if (i === index) {
                        index = datas.length - 1;
                    }
                }
            });
            Config.currentWindow.$.touch({
                id: new Date().getTime(),
                datas,
                currentIndex: index || 0
            });
        } else if (attType === "pdf") {
            const currentFile = params.attachmentInfo.attachmentInfos[index];
            // 不支持office在线转换,走以前的逻辑
            if(currentFile.isWpsOnlineEnable === '0'){
                let url = `${Config._ctxPath()}/fileDownload.do?method=doDownload4Office&type=Pdf&isOpenFile=true&fileId=${currentFile.fileUrl}&createDate=${currentFile.createdate}&filename=${encodeURIComponent(currentFile.filename)}&v=${currentFile.v}${Config.urlSurffix}`;
                Config.currentWindow.addattachDialog = null;
                Config.currentWindow.addattachDialog = Config.currentWindow.$.dialog({
                    title: $.i18n("officeTrans.view.label"),
                    transParams: { parentWin: window },
                    url,
                    width: 1280,
                    height: 800
                });
            }else{
                let url = `${Config._ctxPath()}/officeTrans.do?method=view&fileId=${currentFile.fileUrl}&createDate=${currentFile.createdate}&filename=${encodeURIComponent(currentFile.filename)}&v=${currentFile.v}${Config.urlSurffix}`;
                this.$refs.myFormIframe.src = url;
            }
        } else {
            const file = params.attachmentInfo.attachmentInfos[index];
            const viewUrl = `${Config._ctxPath()}/officeTrans.do?method=view&fileId=${file.fileUrl}&createDate=${file.createdate}&v=${file.v}&filename=${encodeURI(file.filename)}`;
            this.$refs.myFormIframe.src = viewUrl;
        }
    },
# 修改公共组件后打包流程
第一步:进入m_index先执行npm run buildSeeyon
第二步:进入pc_portal_space再执行 npm run buildSeeyon
快速跳转
